Soft Milk Burfi with coconut coating
- Cakes By Catriona
- Sep 15, 2020
- 2 min read
Updated: Nov 14, 2020
Soft Milk Burfi with coconut coating (For about 30 servings)
1 can of condensed milk (397ml)
200ml heavy whipping cream (refer photo step 1)
100g white chocolate
50g almond powder
1 pinch of Salt
2g ground cardamom (Elaiti)
1g of vanilla powder (optional)
80g coconut flakes for coating (can be colored or left natural)
Food coloring (Any color of your choice, preferentially in gel or powder form)
Procedure
Step 1: In a bowl, place your almond powder, vanilla powder, cardamom powder, white chocolate and salt

Step 2: In your pan on a low heat, add your condensed milk followed by your whipping cream.

Step 3: Allow your mixure to boil while continuously stirring. At this stage your whipping cream and your condensed milk will be fully mixed (indicated by a uniform yellowish color).

Step 4: When your milk mixture has started to boil, allow to simmer for about 5 minutes still on low heat while stirring continuously. After that, switch OFF the heat and add your almond powder, vanilla powder, cardamom powder, white chocolate and salt (from step 1) together 2-3 drops of your food coloring.

Step 5: Stir continuously while allowing the chocolate to melt slowly.

Step 6: Your mixture is ready !

Step 7: Place your mixture in a slightly greased silicon mold (8" x 8") and allow it to cool for some hours (overnight if possible). You will know when it is ready when your burfi detach from the border of the mold as indicated by the red arrow.
(Note: Remember this is a soft burfi such that you should not expect it to be very hard)
Tip: You can as well leave it in the refrigerator 15-20 minutes prior to cutting. This will allow it to harden further to allow easy unmolding and cutting .

Step 8: Color your coconut flakes using your favourite food coloring (optional)

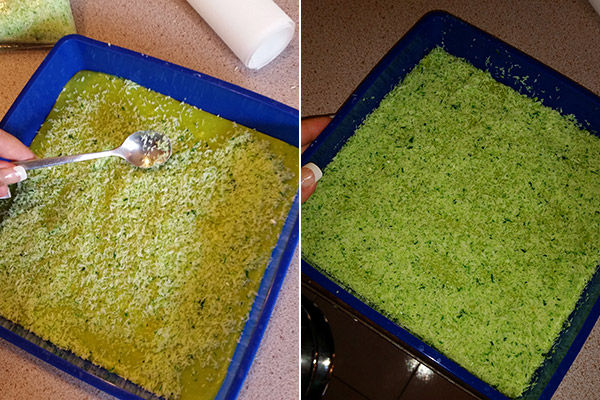
Step 9: Coat the top of your burfi with some coconut flakes. Do not forget to insert a bit around the perimeter as well. The more you coat, the less probable your Burfi will "stick" to the mold (easy unmoding).

Step 10: Once the top is coated, turn your Burfi upside down on a baking sheet and this time coat this uncoated side with more coconut flakes! Once completed, using your pastry ruler, trace your cutting lines !

Step 11: Cut your Burfi accordingly (your Burfi is soft enough for you to use your pastry ruler to carry out this cutting task ..). Moreover you may add some more coconut flakes (perimeter of each slice).

Step 12: Now take your cupcake liners and flatten them as in the picture below

Step 13: Insert one or two Burfi in each of them (that are the cupcake liners) and seal them individually (preferentially in a transparent plastic) for increased freshness !...
Voila !


THANK YOU FOR WATCHING !...


Comments